If your toilet is running, noisy, or not refilling efficiently, a simple fix might be all you need: changing the fill valve. Below is a quick walkthrough of the process, along with a couple of extra tips for stabilizing the toilet tank and tightening a loose seat.
1. Turn Off the Water and Drain the Tank
- Locate the Shutoff
Look behind or beneath the toilet for the shutoff valve (angle stop). Turn it clockwise to stop the water flow. - Drain the Tank
Hold down the toilet handle to flush and empty the bowl as much as possible. Use a sponge, towel, or shop vacuum to remove the remaining water in the tank.
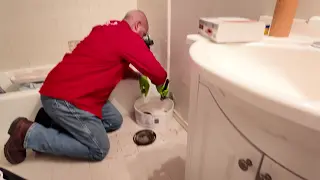
2. Remove the Old Fill Valve
- Disconnect Supply Line
Place a rag or small container under the connection to catch drips. Unscrew the water supply line from the bottom of the fill valve. - Unscrew the Fill Valve Nut
The fill valve is secured to the toilet tank by a plastic or metal nut on the underside. Use adjustable pliers or a wrench to loosen and remove it. - Lift Out the Valve
Pull the old valve straight up out of the tank.
3. Prepare and Insert the New Valve
- Adjust Height
Many newer fill valves, such as Fluidmaster models, have a twist-adjustment for height. Ensure the top of the valve (vacuum breaker) sits above the overflow tube in the toilet. - Position the Valve
Place the rubber washer or gasket on the valve’s base (lip facing the tank hole) and insert the valve into the tank. Orient it so any float adjustment dials or side outlets are easily accessible and won’t interfere with the handle or flush lever.
4. Secure the Valve and Hook Up the Water
- Tighten the Lock Nut
Thread the nut onto the fill valve from outside the tank. Hand-tighten first, then use pliers for a final snug—avoid overtightening to prevent cracking the porcelain. - Reconnect Supply Line
Reattach the flexible water supply line to the new fill valve’s bottom inlet. Make sure the line isn’t kinked.
5. Refill and Fine-Tune
- Turn On the Water
Slowly open the shutoff valve. The tank should start filling. - Check Water Level
Once the tank stops filling, see if the water line reaches about a half-inch below the top of the overflow tube. If needed, twist the float adjustment knob or screw to raise or lower the water level. - Test Flush
Flush the toilet and verify the water refills efficiently and stops at the correct height.
6. Additional Quick Fixes
- Stabilize a Wobbly Tank
If the toilet tank wiggles, tighten the tank-to-bowl bolts using a screwdriver or small wrench. These should be snug but not overly torqued (which could crack the porcelain). - Secure a Loose Seat
If the seat shifts, pop the seat bolt covers near the back of the bowl and tighten each bolt. For plastic seat bolts, avoid over-tightening since they can strip easily.
Final Check
• Flush the toilet a few more times to ensure everything works smoothly and no leaks appear at the base or supply line.
• Listen to confirm the valve stops running once the tank reaches the proper fill level.
Swapping a fill valve is one of the easiest ways to fix common toilet issues—like continuous running or slow refill—without calling a professional. With just a few tools and about 15 minutes, you’ll have a smoothly operating toilet again.